网站备案
备案类型
IPC备案
不支持个人申请,需要有资质的服务器供应商,比如阿里云,腾讯云;
服务器在国内,不备案是不行的,毕竟服务器供应商想停就停;
做这个备案主要是为了网站可以被访问,所以国内服务器的网站是要做的;
七牛云的国内加速域名也需要IPC备案。
公安网备案
- 一般是基于IPC备案的,因为
法规
根据《计算机信息网络国际联网安全保护管理办法》(公安部令第33号)第二十三条规定“违反本办法第十一条、第十二条规定,不履行备案职责的,由公安机关给予警告或者停机整顿不超过六个月的处罚。
- 所以说服务器在境外,只有被墙的风险;
- 公安网备案有利于对网站的检举监督,网安估摸着是想所有网站都去公安备案,我一境外服务器也让我备案(一开始不懂,申请了,都撤回了,还电话让我备案),不过也无所谓,放在底下,当作是网站的门神了 😅 。
博客备案
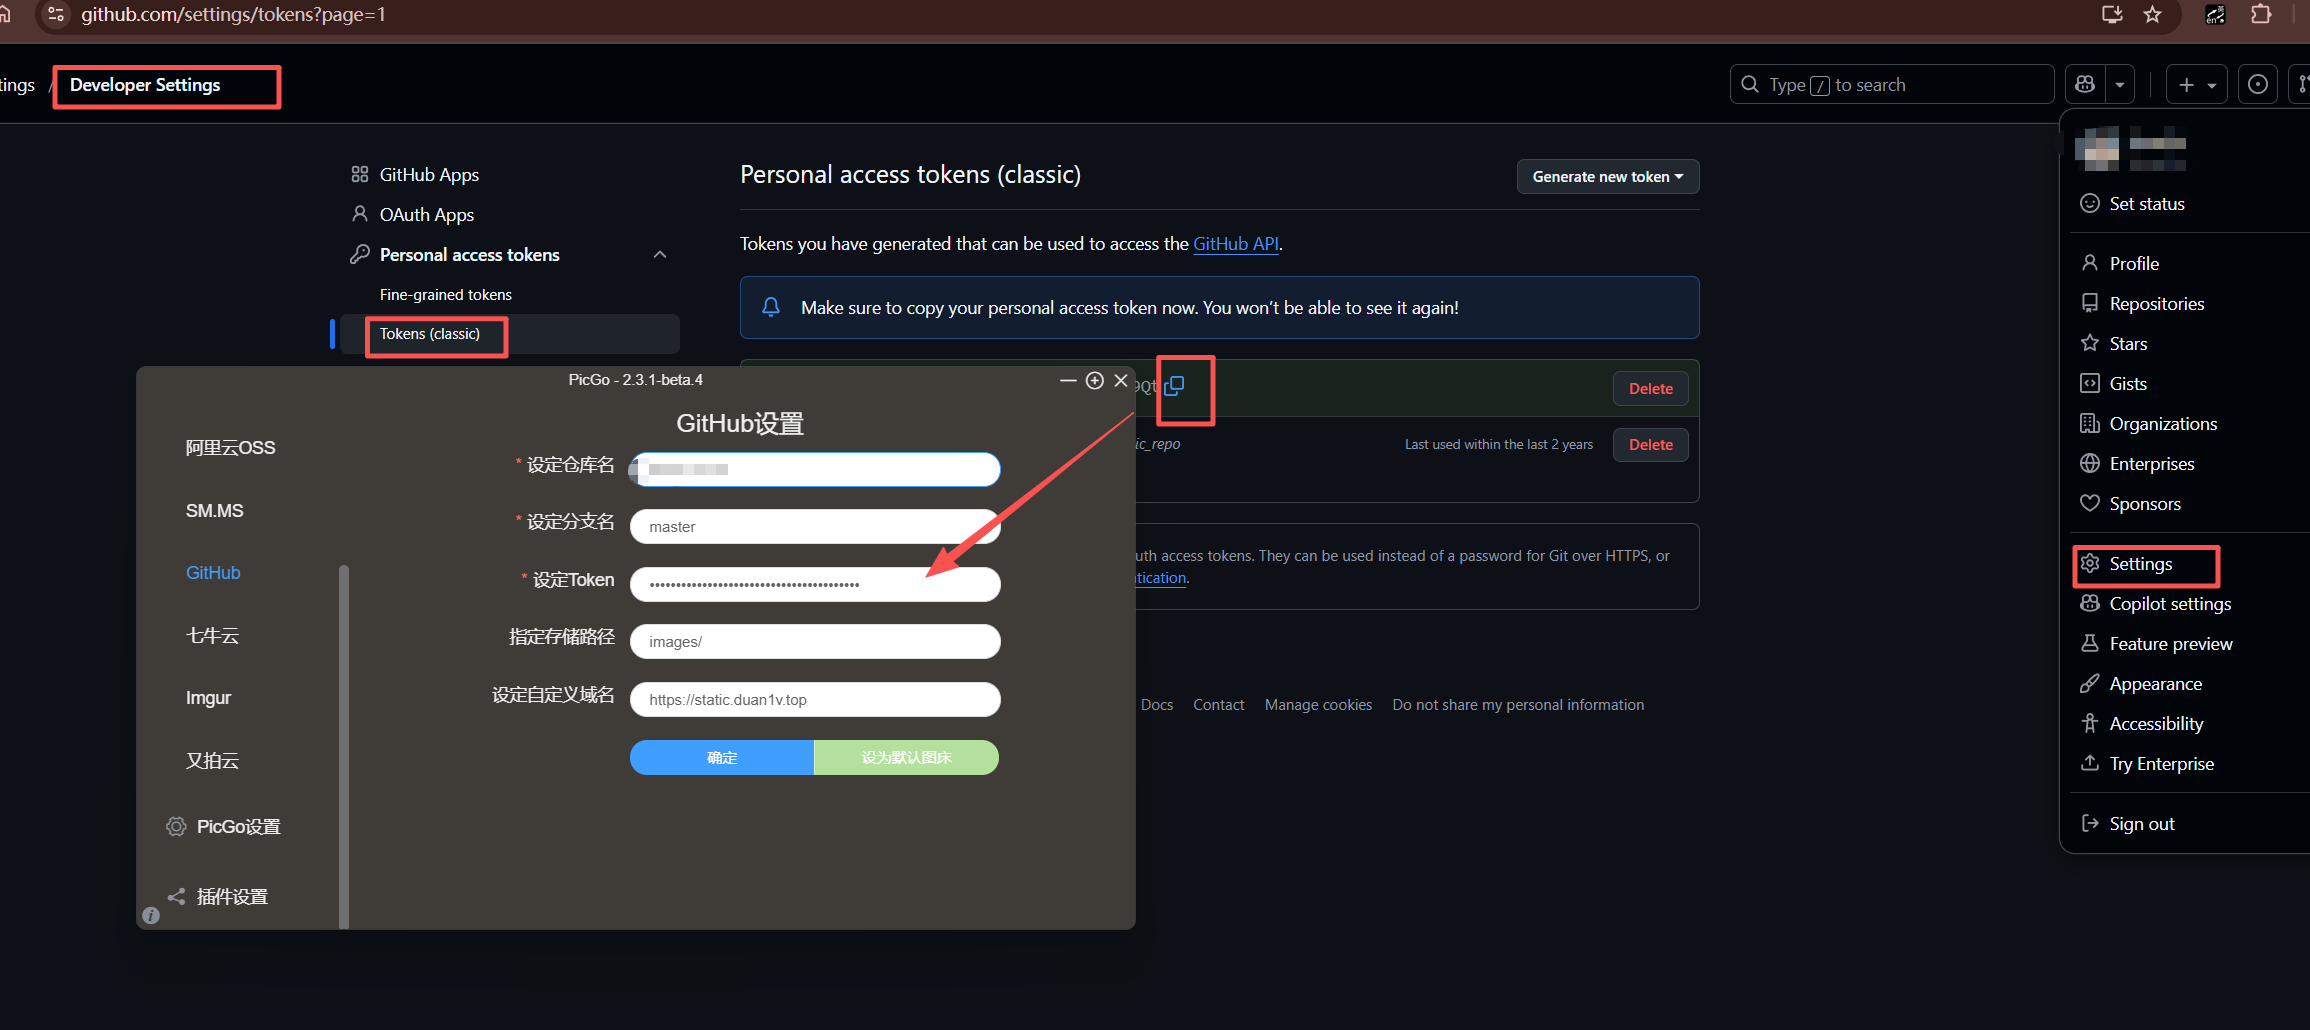
github page或者 netlify等部署想要使用七牛云怎么办
Note
对于这些无服务器或者说未购买服务器的博客,域名是肯定要的,但是光有域名,也只能使用境外的CDN,所以域名要进行IPC备案
如果说在腾讯云只买了域名能进行IPC备案吗?
Note
客服回答,IPC备案与域名在哪无关,要去服务器供应商平台申请;
但是腾讯云的IPC备案页面有个 备案授权码 ,这个只有企业服务器是有的,但是是可以买到的(某宝),再但是记一下价格;
阿里云也有类似的,备案服务号 ,也是可以买到了,对比一下价格;
所以说,自搭博客的域名不要在腾讯买!买域名前先查下相应平台的备案服务号价格!